You don't have to install Bookstack using containers. It's just my preference. You can see all the installation methods by going to [**Bookstack's official installation web page**](https://www.bookstackapp.com/docs/admin/installation/#other).
I am using a pre-built container from [**LinuxServer.io**](https://github.com/linuxserver/docker-bookstack/pkgs/container/bookstack). You gain access to the relevant container images via a Docker Compose YAML file. You will need to edit various parameters to configure Bookstack and your Bookstack database. Container images are configured using parameters passed at runtime. These parameters are separated by a colon and indicate `Go [**HERE**](https://en.m.wikipedia.org/wiki/List_of_tz_database_time_zones "Timezone Database Environment Variables") to find your timezone
- Change DB\_USER and MYSQL\_USER to whatever you want, but both need to be the same user OR you can leave both as 'bookstack'. - Change DB\_PASS and MYSQL\_PASSWORD to a long, strong password. Both variables need to match one another. - Under the volumes section, change '/path/to/data' to the path of the directory where you will store your Bookstack configuration data.Make sure the user and group you specified in your PUID & GUID has read and write permissions to the path and directory you specify.
- You can also change the port you will use to access Bookstack. The default port is 6875. You really only need to change this if that port is already in use on the computer on which you are installing Bookstack. Once you have your docker-compose.yml configured and saved, you can start your Bookstack instance by typing: ``` docker compose up -d ``` or, if using an older version of Docker Compose: ``` docker-compose up -d ```You must run the command from the directory where you saved your docker-compose.yml file.
#### Access to Bookstack From a web browser on the computer where you installed Bookstack, enter the following URL: [http://localhost:6875](http://localhost:6875)If you changed the default port from 6875 to something else, you will need to specify it in your URL
If you are on a different computer than the one where you installed bookstack. change *localhost* to reflect the IP address or domain name of the computer where Bookstack is installed. # Mealie  [**Mealie**](https://mealie.io/) is a self hosted recipe manager and meal planner with a RestAPI backend and a reactive frontend application built in Vue for a pleasant user experience for the whole family. Easily add recipes into your database by providing the url and Mealie will automatically import the relevant data or add a family recipe with the UI editor. Mealie also provides an API for interactions from 3rd party applications. 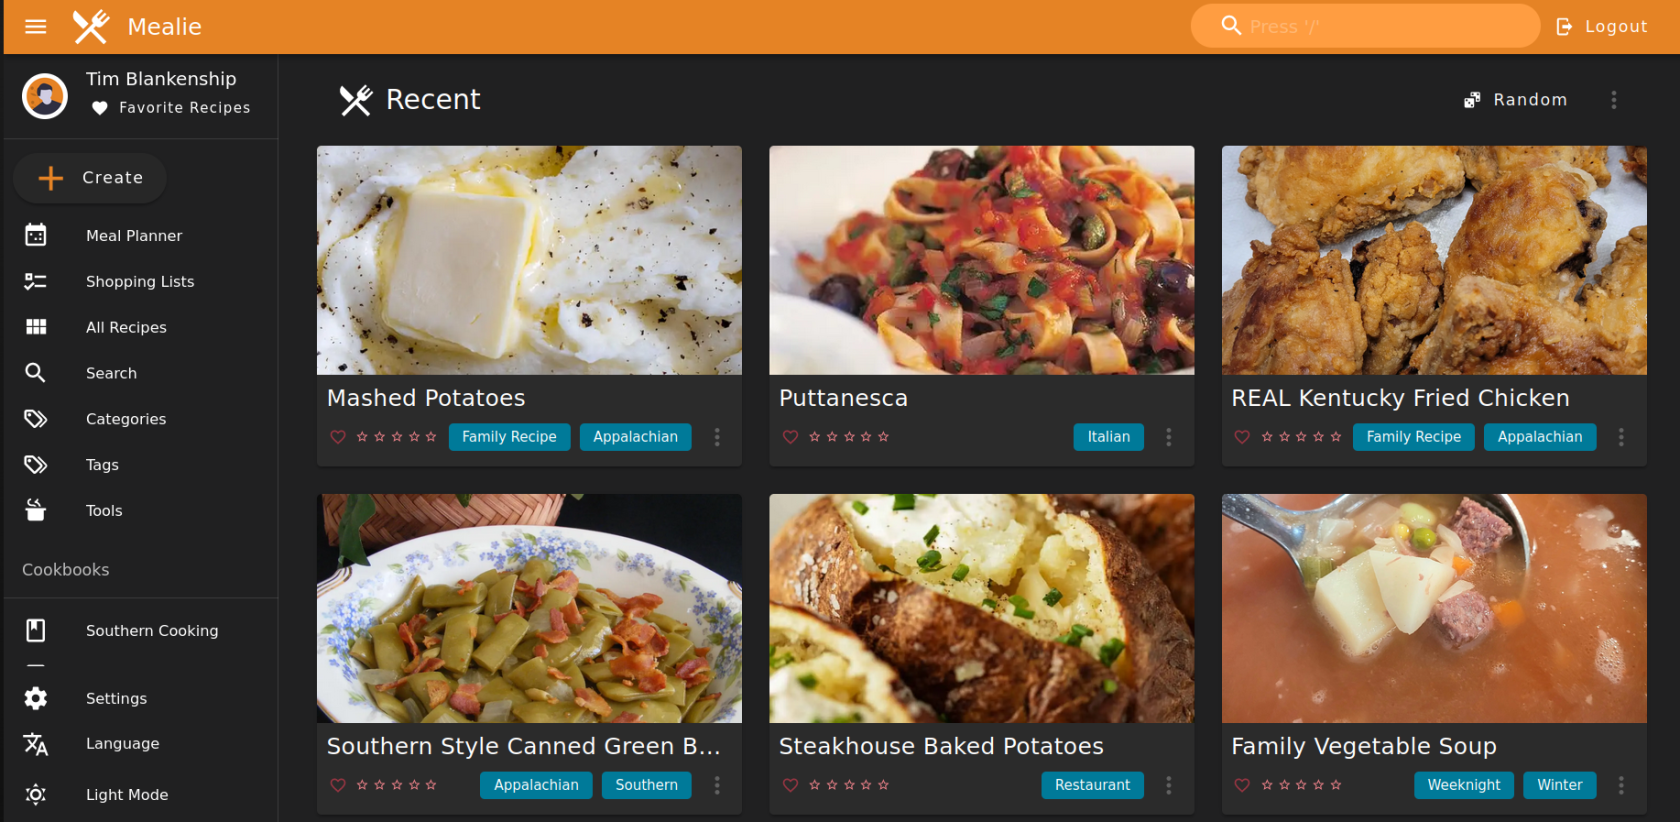 #### Key Features - 🔍 Fuzzy search - 🏷️ Tag recipes with categories or tags to flexible sorting - 🕸 Import recipes from around the web by URL - 📱 Progressive Web App - 📆 Create Meal Plans - 🛒 Generate shopping lists - 🐳 Easy setup with Docker - 🎨 Customize your interface with color themes layouts - 💾 Export all your data in any format with Jinja2 Templates, with easy data restoration from the user interface. - 🌍 localized in many languages - ➕ Plus tons more! - Flexible API - Custom key/value pairs for recipes - Webhook support - Interactive API Documentation - Raw JSON Recipe Editor - Migration from other platforms - Chowdown - Nextcloud Cookbook - Random meal plan generation --- # NextCloud  [**Nextcloud**](https://nextcloud.com/) is the industry-leading, fully open-source, on-premises (self-hosted) content collaboration platform. Teams access, share and edit their documents, chat and participate in video calls and manage their mail and calendar and projects across mobile, desktop and web interfaces. Hub integrates the four key Nextcloud products Files, Talk, Groupware and Office into a single platform, optimizing the flow of collaboration. Eliminate the confusing hodgepodge of different SaaS tools and the compliance, security, cost and productivity issues that come with it and standardize on a single solution with Nextcloud Hub. --- # Vaultwarden  [**Vaultwarden**](https://github.com/dani-garcia/vaultwarden) is an alternative self-hosted implementation of Bitwarden. It is compatible with all [upstream Bitwarden clients](https://bitwarden.com/download/) Bitwarden is an open-source password management service that stores sensitive information such as website credentials in an encrypted vault. The platform offers a variety of client applications including a web interface, desktop applications, browser extensions, mobile apps, and a command-line interface. --- #### Installation Pull the docker image and mount a volume from the host for persistent storage: ```shell docker pull vaultwarden/server:latest docker run -d --name vaultwarden -v /vw-data/:/data/ -p 80:80 vaultwarden/server:latest ``` Change `/vw-data/` to the path where you will store your vaultwarden data locally. Change the port if you are already using port 80 for another service on the installation computer. For example, from `80:80` to `8181:80` If you are installing on a Linux server, you can verify what ports are in use by using this command ```shell sudo ss -ltn ```It is highly recommended to secure your Vaultwarden server using a TLS certificate. If you have an available domain name, you can get HTTPS certificates with [Let's Encrypt](https://letsencrypt.org/), or you can generate self-signed certificates with utilities like [mkcert](https://github.com/FiloSottile/mkcert). Some proxies automate getting certificates, like [**NGINX Proxy Manager**](https://bookstack.timshome.net/books/home-server-applications/page/nginx-proxy-manager).
--- #### Accessing Vaultwarden ##### Browser To access your Vaultwarden server from a web browser, locally `http://localhost:port`[ ](http://localhost)where 'localhost' is the IP address of your Vaultwarden server and 'port' is the port number you defined in your docker container if it is any port other than port 80. You should see a screen similar to this: 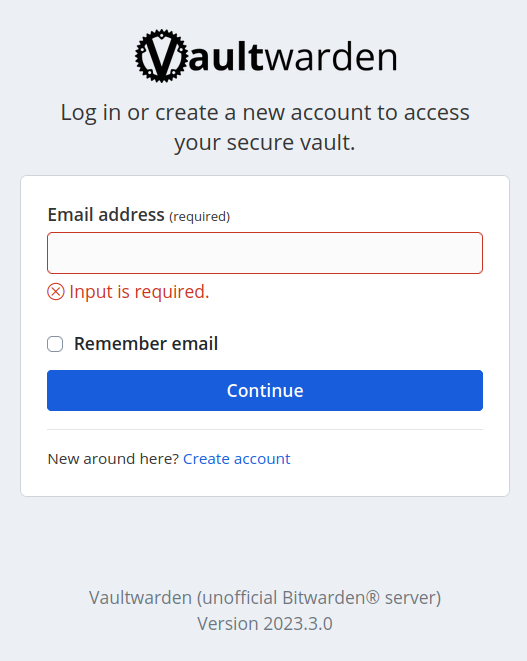 You will need to create an account to use it. Just click the 'Create account' link on the page.It is also worth noting that you can export your current Bitwarden data (if you already had a Bitwarden account) directly into Vaultwarden by using any Bitwarden client's 'Export Vault' function while logged with your Bitwarden account. You can export into .json or csv formats. You then log out of your Bitwarden account and and login using your Vaultwarden account on that same client and import your data using the 'Import Vault' function. Your data will then automatically sync to any other Bitwarden client where you have your Vaultwarden account set up.
--- #### Clients You can access you Vaultwarden server using any of the clients supported by Bitwarden. To set your Bitwarden clients to point to your Vaultwarden server, follow these instructions: ##### Browser Extension or Mobile App To connect a browser extension or mobile app to your Vaultwarden server: 1. Log out of your Bitwarden browser extension or mobile app. 2. On the login screen, select the [](https://bookstack.timshome.net/uploads/images/gallery/2023-04/gZTZXDCrtAcsOL6R-screenshot-from-2023-04-09-08-15-50.png) **Settings** icon. 3. In the **Server URL** field, enter the domain name for your server with `https://` (for example, `https://my.bitwarden.domain.com`). 4. Select **Save**.You must have your Vaultwarden server setup with a domain name and a TLS or self-signed certificate for this to work
##### Desktop Client Each account that's logged in to your desktop app can be connected to a different server. For example, you can have one account that connects to a Bitwarden server in the cloud and another account that connects to a private Vaultwarden server. To connect your desktop client to point to your Vaultwarden server: 1. Log out of your account in your Bitwarden desktop app **OR** select **+** **Add Account**. 2. On the login screen, select the [](https://bookstack.timshome.net/uploads/images/gallery/2023-04/gZTZXDCrtAcsOL6R-screenshot-from-2023-04-09-08-15-50.png) **Settings** icon. 3. In the **Server URL** field, enter the domain name for your server with `https://` (for example, `https://my.bitwarden.domain.com`). 4. Select **Save**.