Linux Mint

Linux Mint is generally regarded as the easiest way to get away from Windows and Mac and enter the wonderful world of open-source operating systems. With a simple installation process, great interface and a lot of ease-of-life features, there’s nothing stopping you from trying out this great version of Linux, especially if you want to avoid Windows 11.
I, myself, started out using Linux Mint when I decided to get away from Microsoft Windows.
The driving factors for my migration from proprietary operating systems to Linux were:
- I was tired of have to reboot my PC every few days to "patch" Windows
- It was taking WAY too long to boot my computer. Sometimes 8-10 minutes a boot. Particularly after a large "patch" would be applied.
- The infamous "Blue screens of death" had become commonplace and I no longer wanted to have to rebuild my PC every few months.
- Anti-virus software and Anti-malware software subscriptions were driving my nuts. I thought there had to be a better way!
Several Internet searches later and I kept being pointed to Linux Mint as the "go to" for a Windows-like experience without the fuss. They were right. I ended up using Mint for several years and as I became more familiar with Linux I ended up outgrowing it and moving on to other Linux distributions. I must say if you are currently using Windows as your operating system but are hesitant to dip your toe into Linux; Linux Mint is the way to start out. You won't be disappointed!
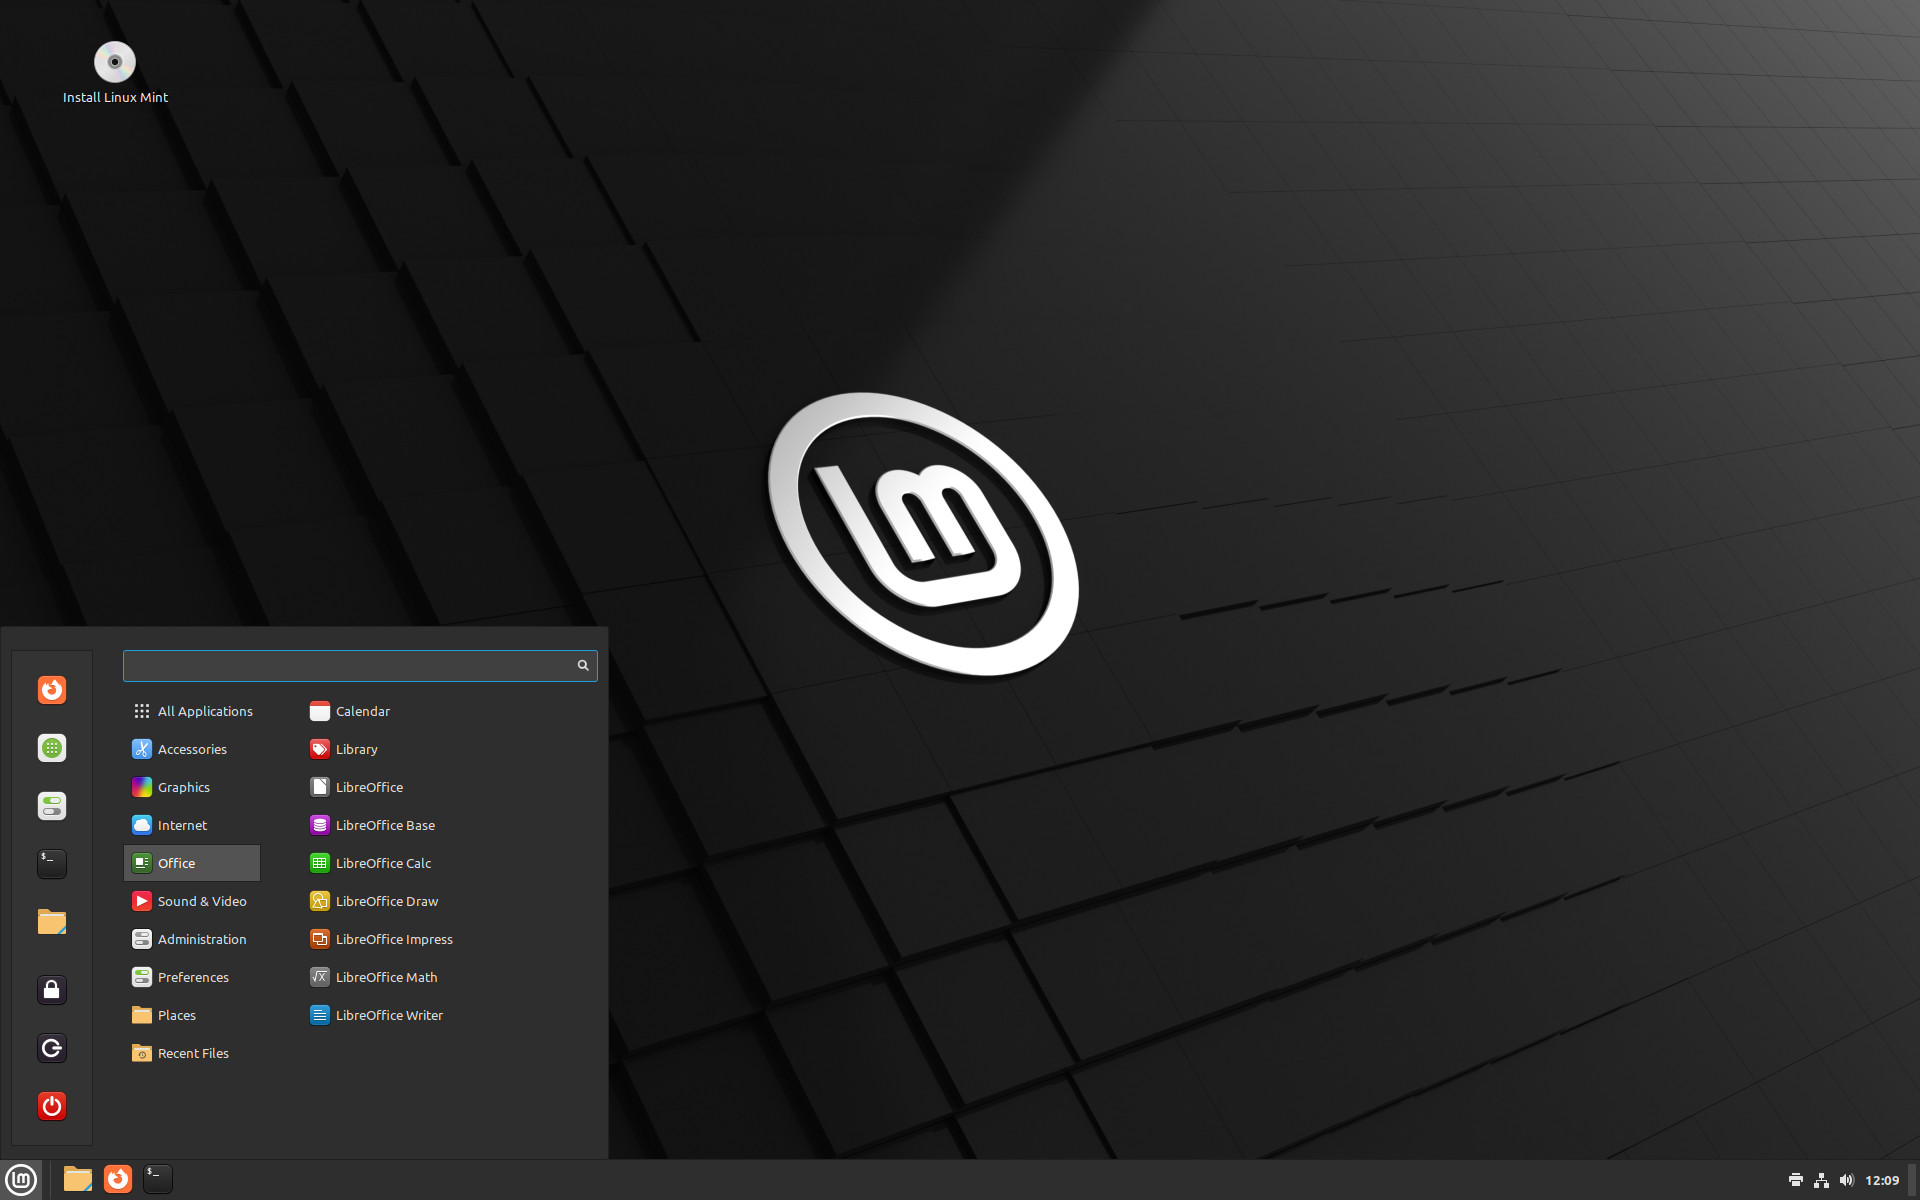
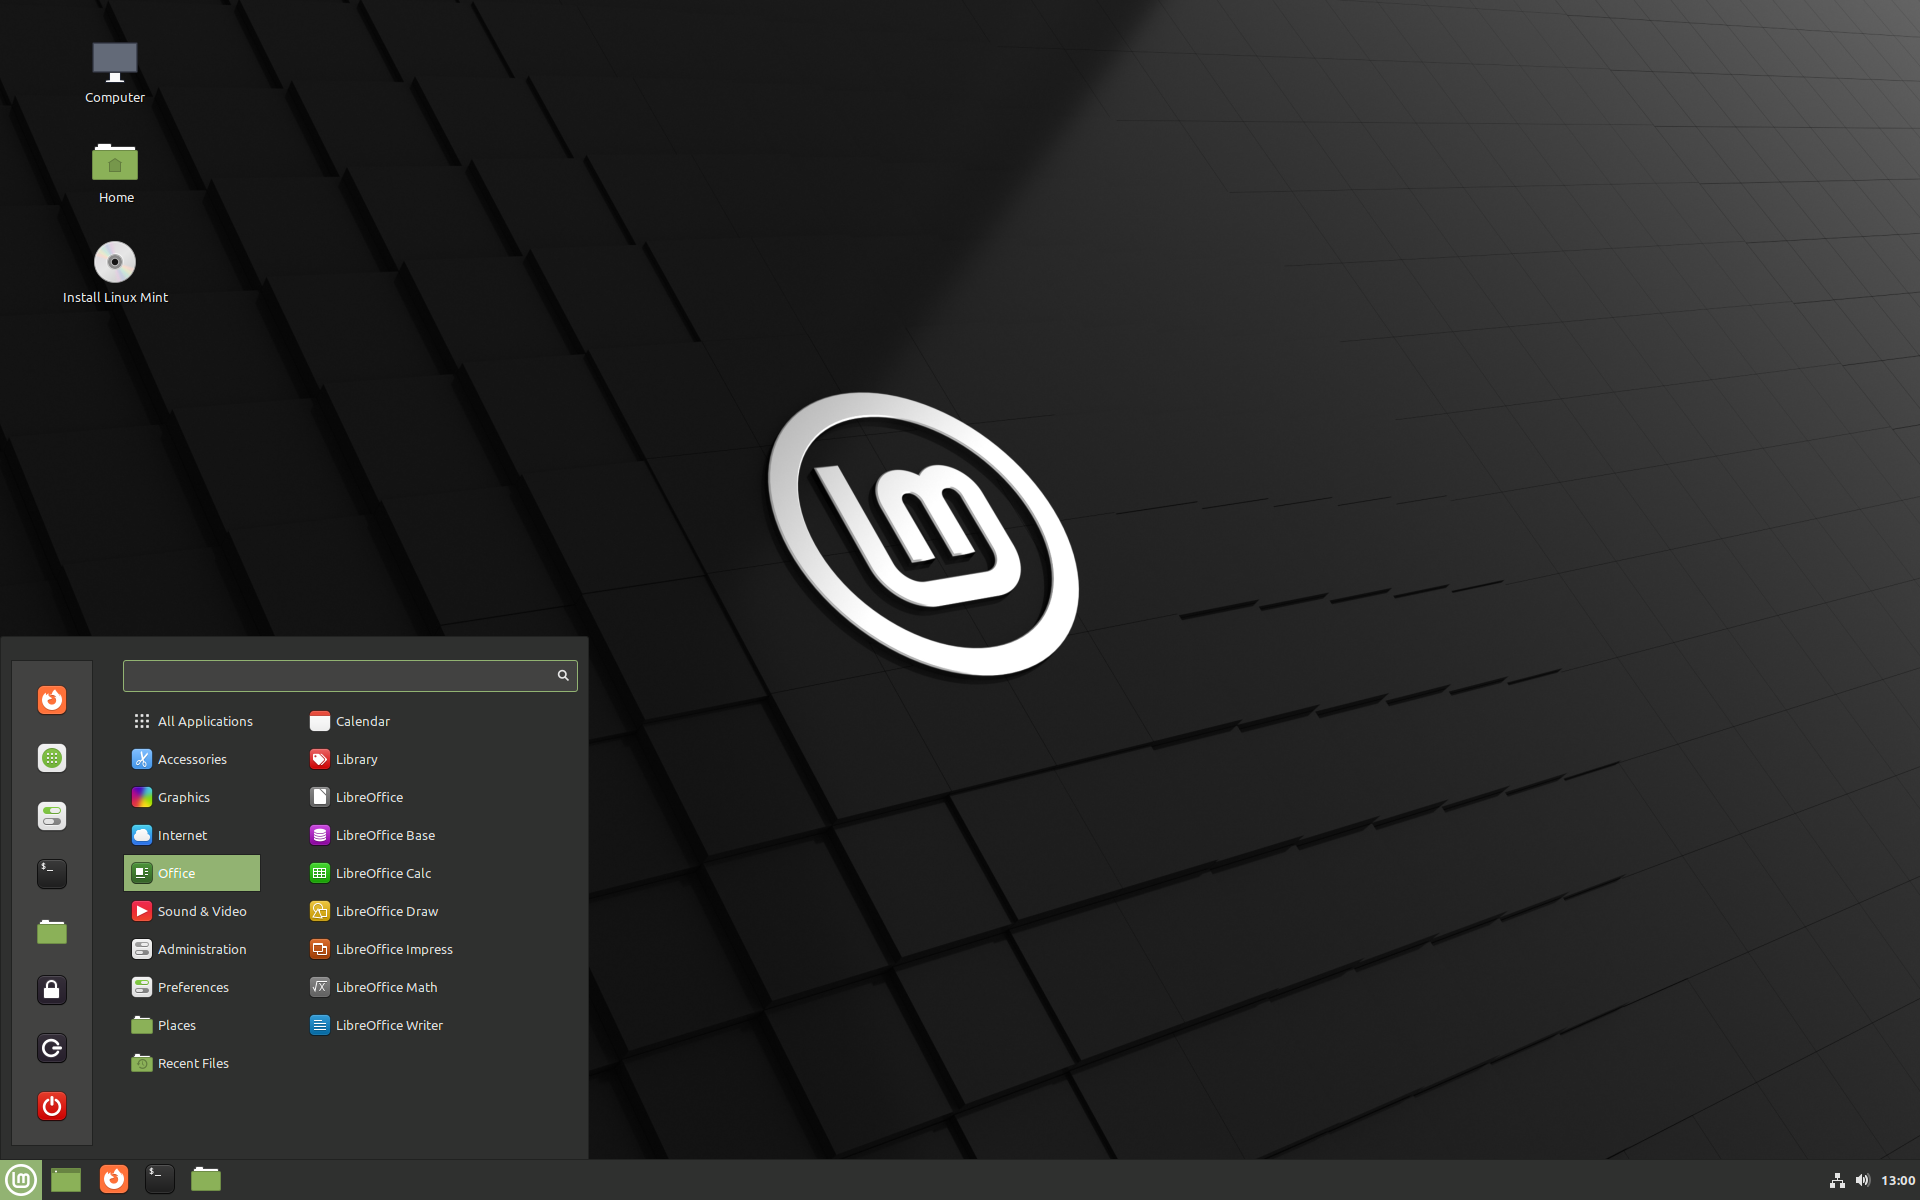
Screenshot of Linux Mint 21 - Cinnamon Edition
Installation
Undoubtedly, Linux Mint is one of the best Linux distributions for beginners. It is easy to use, doesn’t consume lots of system resources and because it is Debian based (like Ubuntu), it has tons of software available as well as a large community for support.
Like other Debian-based Linux distributions, there are three main ways to install Linux Mint:
- Install Linux Mint in VirtualBox in Windows like a regular desktop application.
- Install Linux Mint in dual boot mode with Windows keeping both Windows and Linux Mint on the same computer.
- Replace all other operating systems and install Linux Mint as the only OS on your computer.
IMHO it is best to cut the Microsoft cord completely when installing a Linux distribution. Doing so forces you to address any learning curve head on and you will be better for it later.
If you don't feel comfortable with that you can go to the official Linux Mint installation guide to see ALL the methods of installation.
Install Linux Mint by replacing Windows or any other operating system
Linux Mint comes in 3 different flavors, each featuring a different desktop environment.
| Cinnamon | The most modern, innovative and full-featured desktop |
| MATE | A more traditional, and faster desktop |
| Xfce | The most lightweight desktop |
The most popular version of Linux Mint is the Cinnamon edition and that is the edition we will be using in this guide.
Step 1 - Download "Cinnamon" Edition Linux Mint
Go to the official Linux Mint download site and download the latest version of the Linux Mint distribution. At the time of this writing, that would be Linux Mint 21.1 "Vera" (Cinnamon Edition).
Step 2 - Verify your Download
After you obtain your download, It is considered standard practice to verify the integrity and authenticity of your ISO image.
The integrity check confirms that your ISO image was properly downloaded and that your local file is an exact copy of the file present on the download servers. An error during the download could result in a corrupted file and trigger random issues during the installation.
The authenticity check confirms that the ISO image you downloaded was signed by Linux Mint, and thus that it isn’t a modified or malicious copy made by somebody else.
The full instructions for verifying the integrity and authenticity of your download can be found HERE
I'll be honest here. I rarely perform integrity and authenticity checks on downloads; especially if I am downloading from a trusted source. With that said, if you don't feel comfortable installing it "as is" please perform the integrity and authenticity checks.
Step 3 - Create the boot media
The most common and easiest way to install Linux Mint is with a USB stick. You can also use a DVD, but that is outside the scope of this guide.
How to make a bootable USB stick
If you are migrating to Linux Mint for the first time, you will likely be using Windows, Mac OS or another Linux distribution. The steps below will show you how to prepare your USB stick for a Linux Mint installation.
1. Download Etcher, install it and run it.
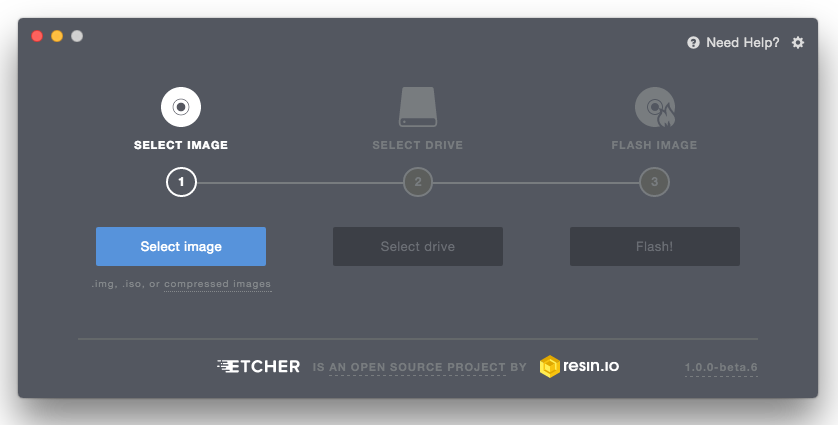
2. Using Etcher, Click Select image and select your ISO file (the file you downloaded from Linux Mint).
3. Click Select drive and select your USB stick.
4. Click Flash!
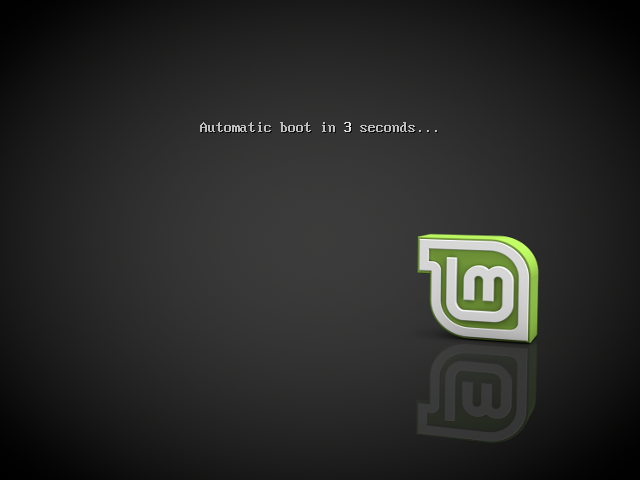
Step 4 - Boot Linux Mint
Now that you have Linux Mint on a USB stick boot the computer from it.
- Insert your USB stick into the computer.
- Restart the computer.
- Before your computer boots your current operating system (Windows, Mac, Linux) you should see your BIOS loading screen. Check the screen or your computer’s documentation to know which key to press and instruct your computer to boot on USB.
Most BIOS have a special key you can press to select the boot device and all of them have a special key to enter the BIOS configuration screen (from which you can define the boot order). Depending on the BIOS, these special keys can be Escape, F1, F2, F8, F10, F11, F12, or Delete. That information is usually briefly written on the screen during the boot sequence.
On Macs, keep your finger pressed on the Alt or Option key after hearing the boot sound.
- The Linux Mint ISO can be booted both in EFI or BIOS mode. In BIOS mode it shows an isolinux menu. In EFI mode it shows a grub menu.
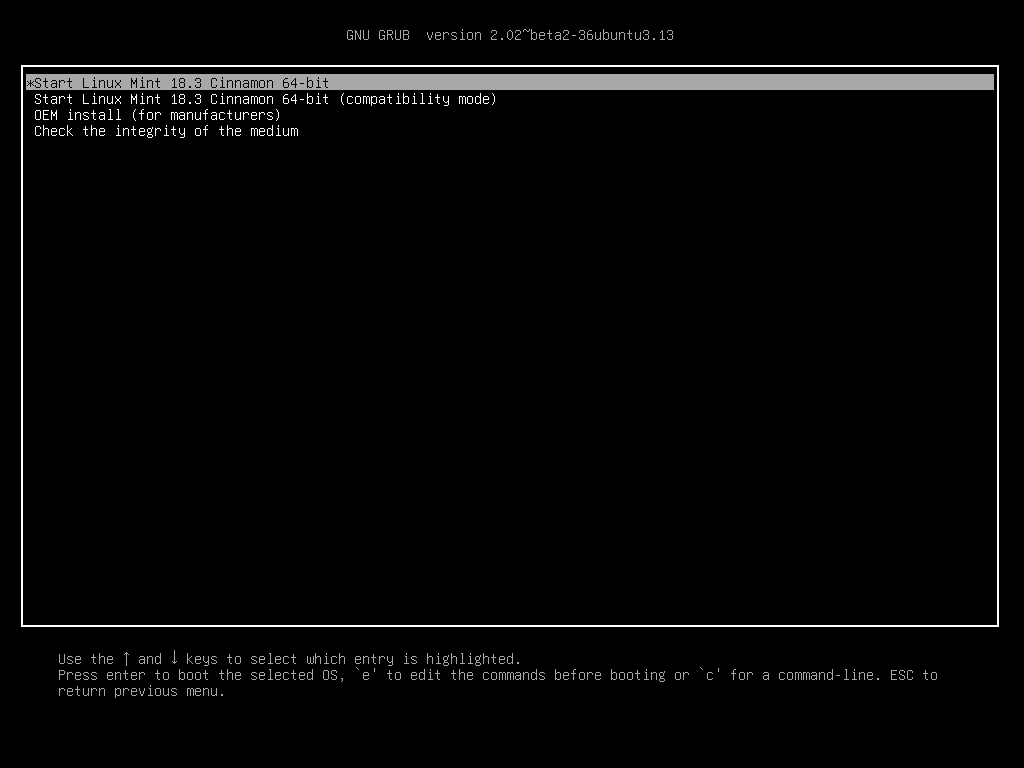
- From whichever menu you receive, press Enter to start Linux Mint from your USB stick.
When you boot the computer from the USB stick, Linux Mint starts a "Live Session". It logs you in automatically as a user called "mint" and shows you a desktop with the installer on it:
The Linux Mint live session
The live session is similar to a normal session (i.e. to Linux Mint once it is permanently installed on the computer), but with the following exceptions:
- The Live session is slower (it is loaded from a USB stick as opposed to a SSD or HDD).
- Changes you make in the live session are not permanent. They are not written to the USB stick and they do not impact the system installed by the installer.
- Some applications work differently (or not at all) in the live session (Timeshift, Flatpak, Update Manager, Welcome Screen..etc.).
The username for the live session is mint. If asked for a password press Enter.
Step 5 - Installing Linux Mint on the computer
To permanently install Linux Mint on your computer:
- Double-click Install Linux Mint.
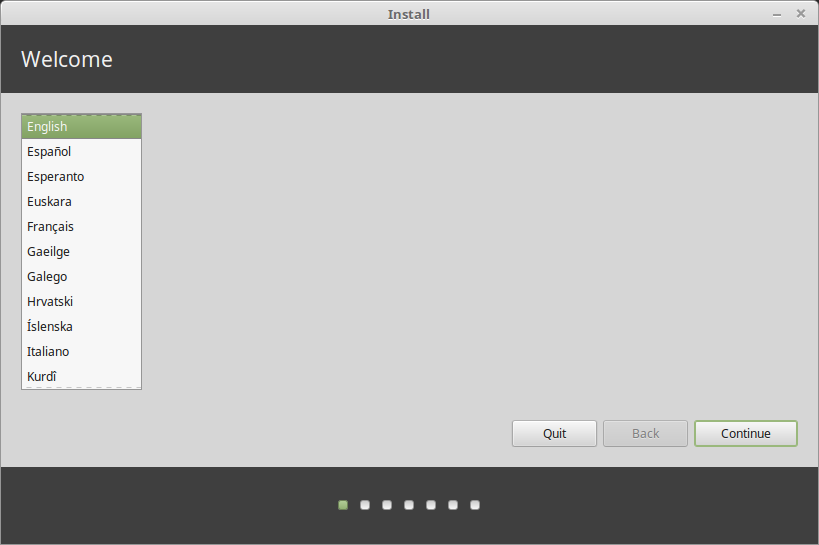
- Select your language.
- Connect to the Internet.
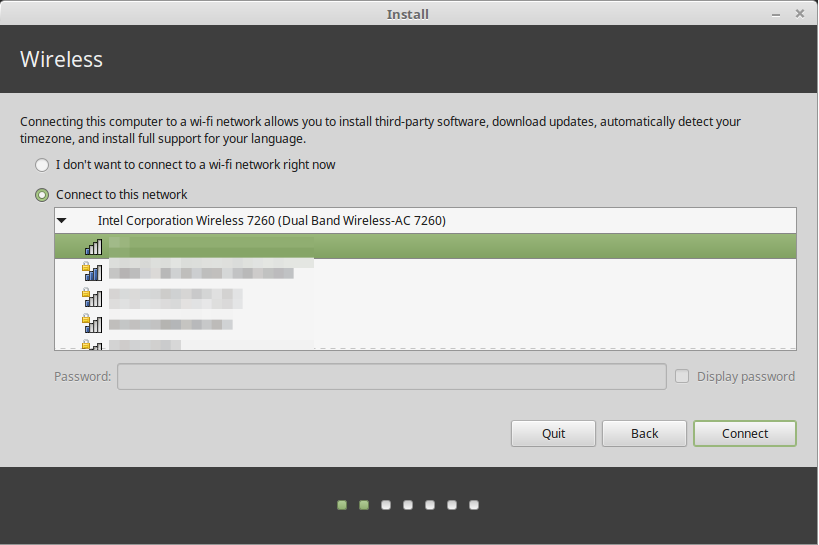
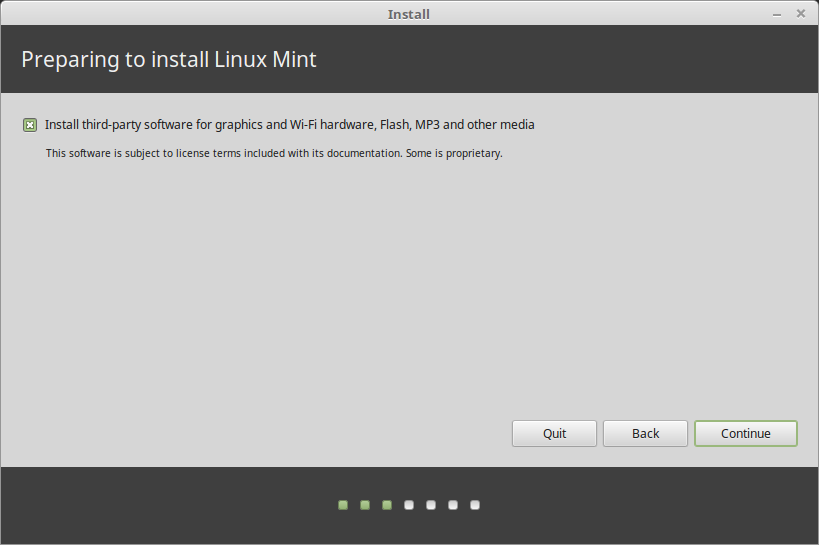
- If you are connected to the Internet, tick the box to install the multimedia codecs.
- Choose an installation type.
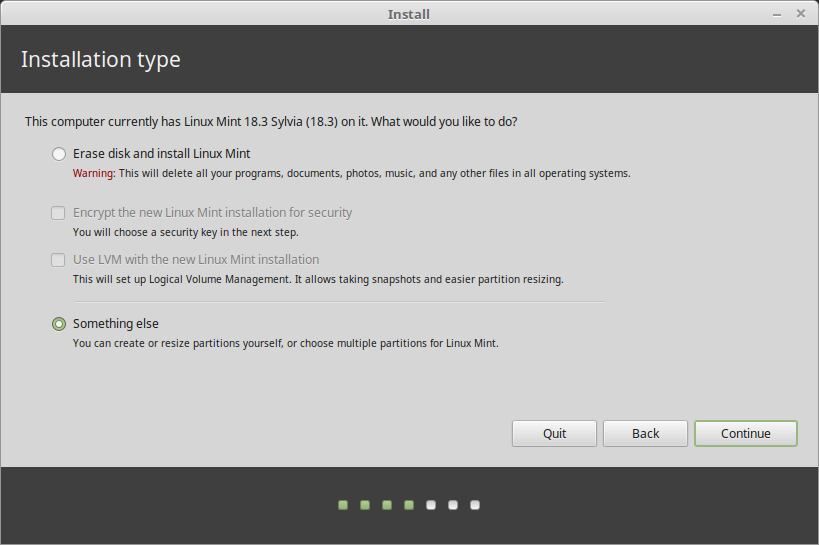
If Linux Mint is the only operating system you want to run on this computer and all data can be lost on the hard drive, choose "Erase disk and install Linux Mint".
"Erase disk and install Linux Mint" is my recommended installation type. Just make sure you backup any data you want to preserve before choosing this.
"Encrypt the new Linux Mint installation for security" refers to full disk encryption. At this stage of the installation your keyboard layout wasn’t yet selected so it is set to en_US. If you decide to use this option, keep this in mind when entering a password. Note that there are issues with this option and some NVIDIA drivers. If you are new to Linux use home directory encryption instead (you can select it later during the installation).
If another operating system is present on the computer, the installer shows you an option to install Linux Mint alongside it. If you choose this option, the installer automatically resizes your existing operating system, makes room and installs Linux Mint beside it. A boot menu is set up to choose between the two operating systems each time you start your computer.
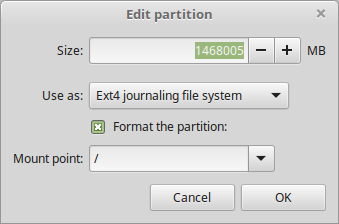
If you want to manage the partitions or specify which partitions to use, select "Something else".
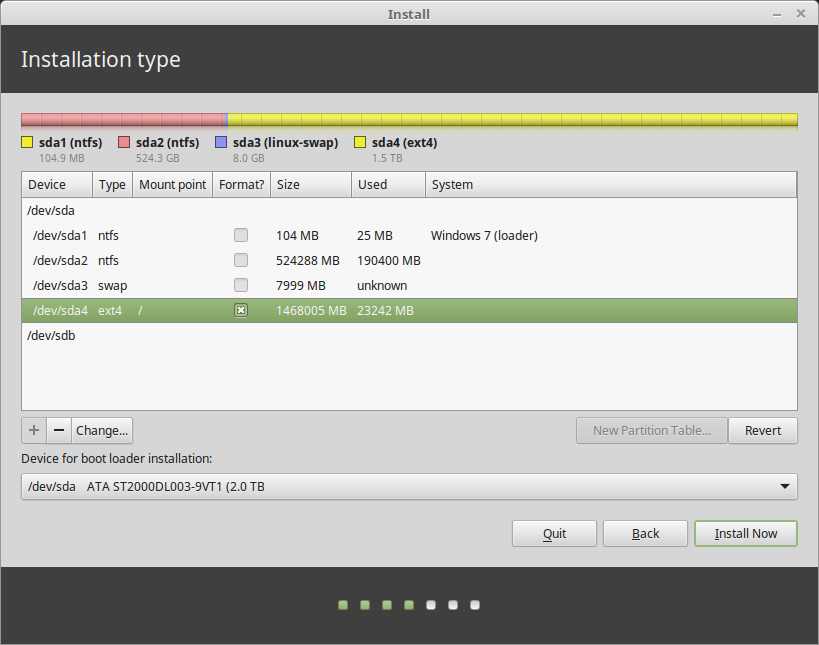
Linux Mint requires one partition to be mounted on the root / directory.
The Linux Mint operating system (without additional software or personal data) takes roughly 15GB, so give this partition a decent size (100GB or more).
ext4 is recommended. It is the most popular Linux filesystem.
Also create a swap partition. This partition is used for hibernation and as a safety buffer in case your computer runs out of RAM. Give this partition a size equal to the amount of RAM in your computer.
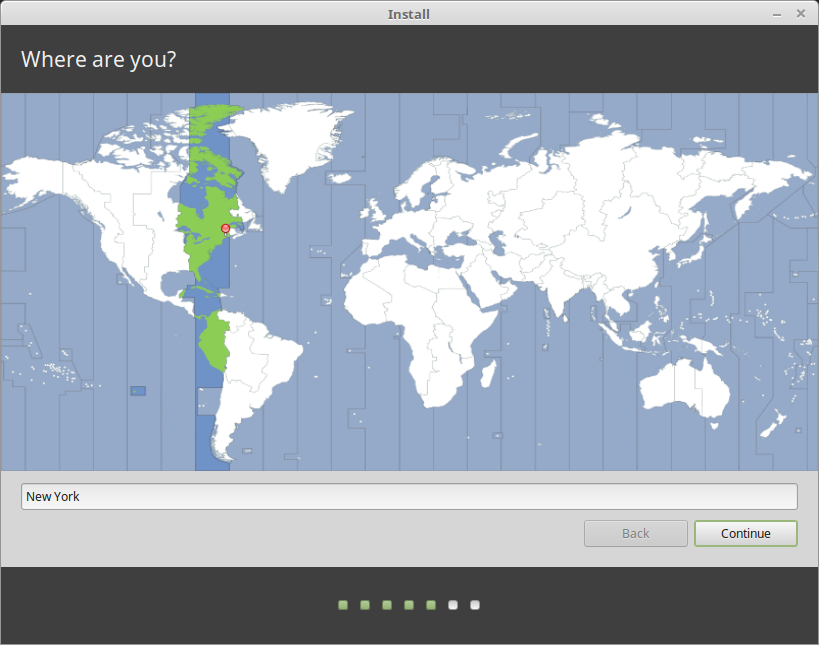
- Select your timezone
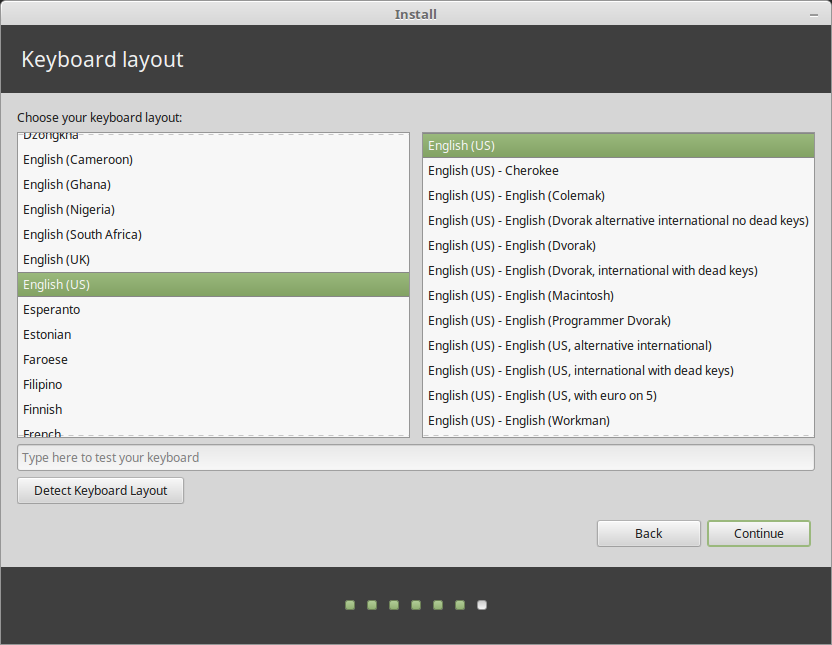
- Select your keyboard layout
- Enter your user details
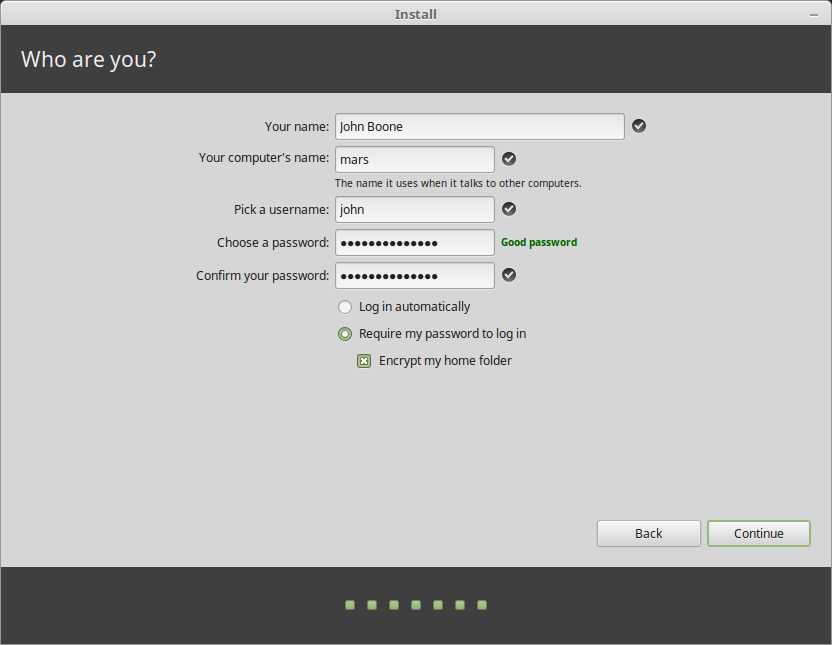
Your name can be your real name, but it doesn’t have to be. It is only used locally, in the screensaver and on the login screen.
Your username is what you log in as, and your hostname is the name of your computer on the network.
To prevent bugs only use lowercase characters, with no punctuation or accentuation.
To protect your personal data against local attacks (people around you, or in case your computer gets stolen), tick Encrypt my home folder.
Choose a strong password.
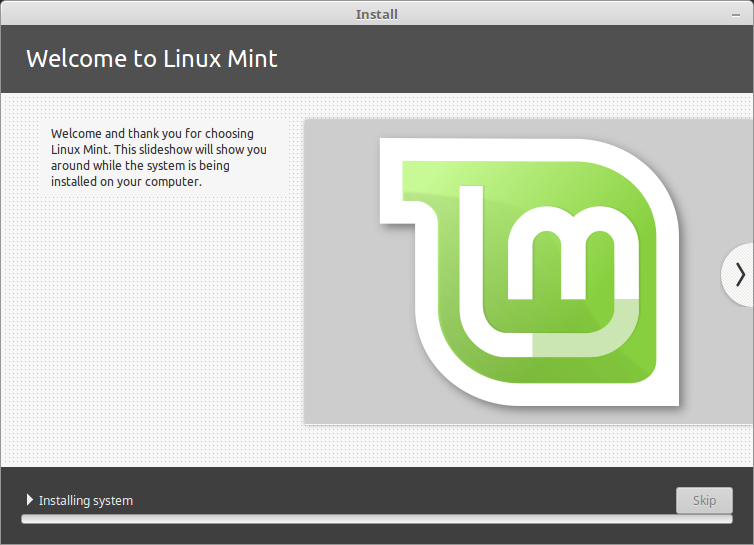
- Enjoy the slideshow while Linux Mint is installed on your computer.
When the installation is finished, click Restart Now.

The computer will then start to shut down and ask you to remove the USB disk. Upon reboot, your computer should show you a boot menu or start your newly installed Linux Mint operating system.