Cockpit
Introduction
Cockpit is a free and opensource web-based graphical server management tool that allows administrators and Linux users to easily manage and configure their Linux servers/PCs from a browser.
Cockpit is easy to install and simple to use. At a glance, it allows you to perform the following tasks.
- Keep tabs of system metrics and performance
- Create and manage users
- Browse and search system logs
- Inspect and interact with systemd-based services
- Access the terminal and run commands
- Inspect system’s hardware
- Create and manage virtual machines
- Upgrade software packages to their latest versions
- Configure Firewall & and many more.
Installation
Update Local Package Index
To start off, log into your server and refresh the local package index as follows.
sudo apt updateInstall Cockpit Web Console
The Cockpit web console packages are provided by the official Ubuntu repositories. You can verify this by running the following command.
apt search cockpitSo, install Cockpit using the APT package manager as shown.
sudo apt install cockpit -yThe command installs the Cockpit web console alongside other additional packages, libraries, and dependencies.
Verify Installation
Once installed, you can verify if cockpit is installed by running the following command:
apt -qq list cockpit OR $ dpkg -l cockpitOptional Packages
If you plan to manage KVM virtual machines with cockpit then install following package:
sudo apt install cockpit-machines -yBy default, Cockpit does not provide support for podman. If you wish to administer and manage podman containers using Cockpit, install the cockpit-podman package which provides support for podman.
sudo apt install cockpit-podman yStarting Cockpit Web Console Service
Unlike other services or daemons, Cockpit does not start automatically once installed. Therefore, start the Cockpit systemd service as shown.
sudo systemctl start cockpitVerify that the Cockpit service is running as follows.
sudo systemctl status cockpitCockpit listens on TCP port 9090. You can verify this is the case by running the following ss command.
ss -tunlpe | grep cockpitIf the firewall is enabled on your Ubuntu 22.04 system, then allow 9090/tcp port so it’s web console can be accessed from outside.
sudo ufw allow 9090/tcp
sudo ufw reload
Access Cockpit Web Console
To access Cockpit Web console, browse the following address, where server-ip is the IP address of your server running the cockpit instance.
You may get a warning that the website you are accessing is not private and that you could fall victim to hackers. Do not fret, as this happens since the server is encrypted by a self-signed SSL certificate which is not recognized by CA.
To get around this issue, simply click ‘Advanced’
Then click on ‘Proceed to [server-ip]’ link.
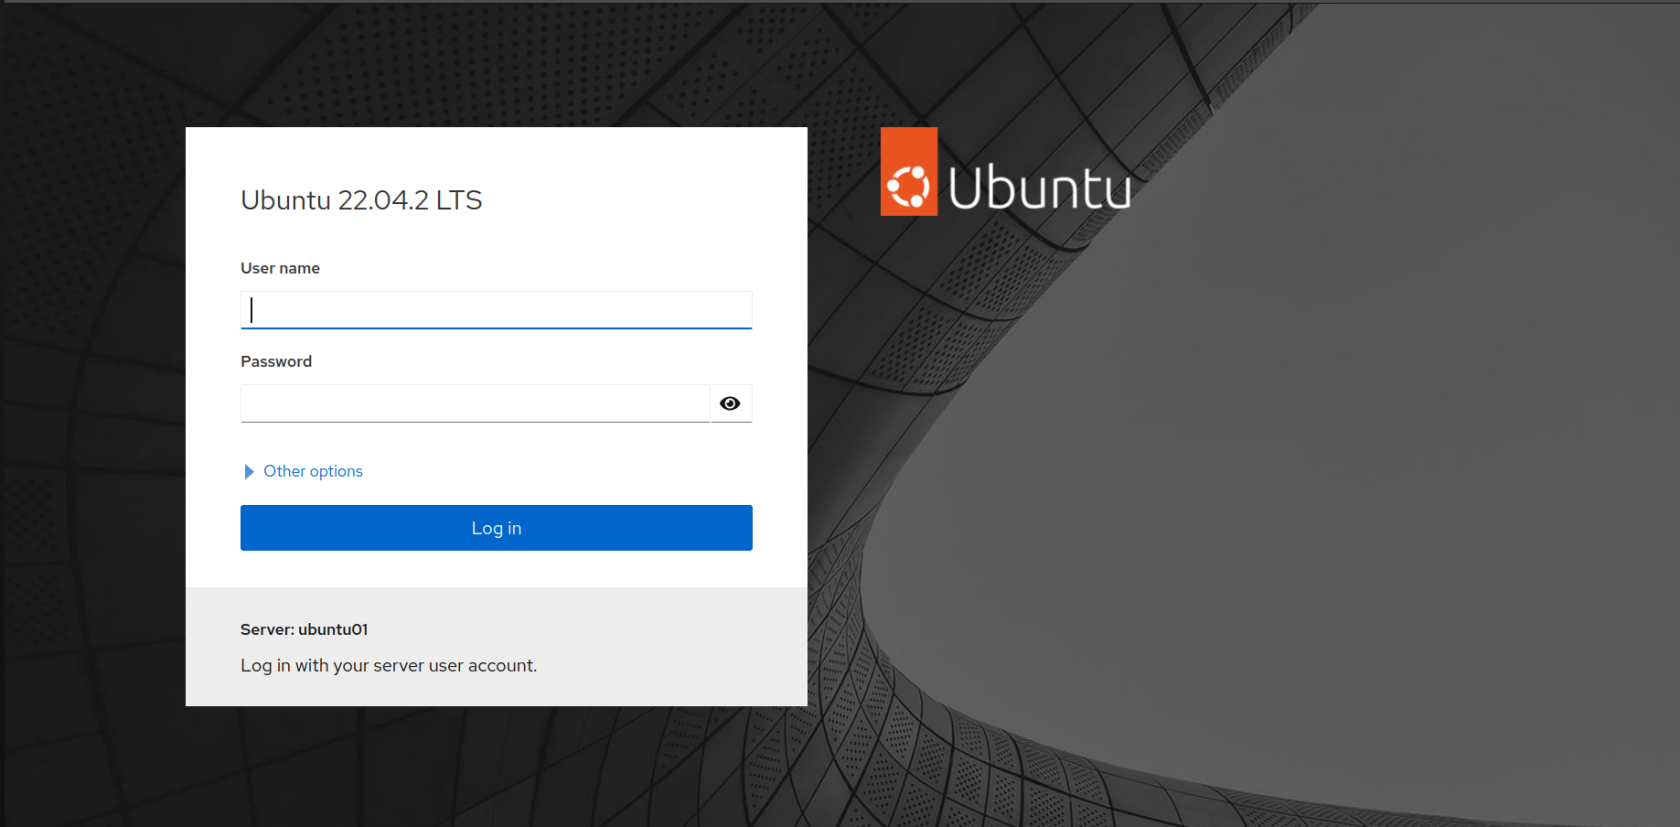
You should get the Cockpit login screen, similar to below.
Cockpit Issues
Known Issues & their Fixes

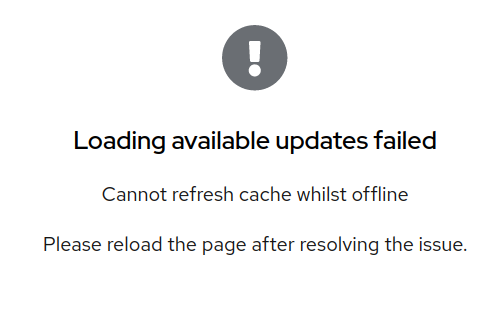
Issue:
Cannot install any Cockpit add-ons or perform any updates from the UI after installing Cockpit
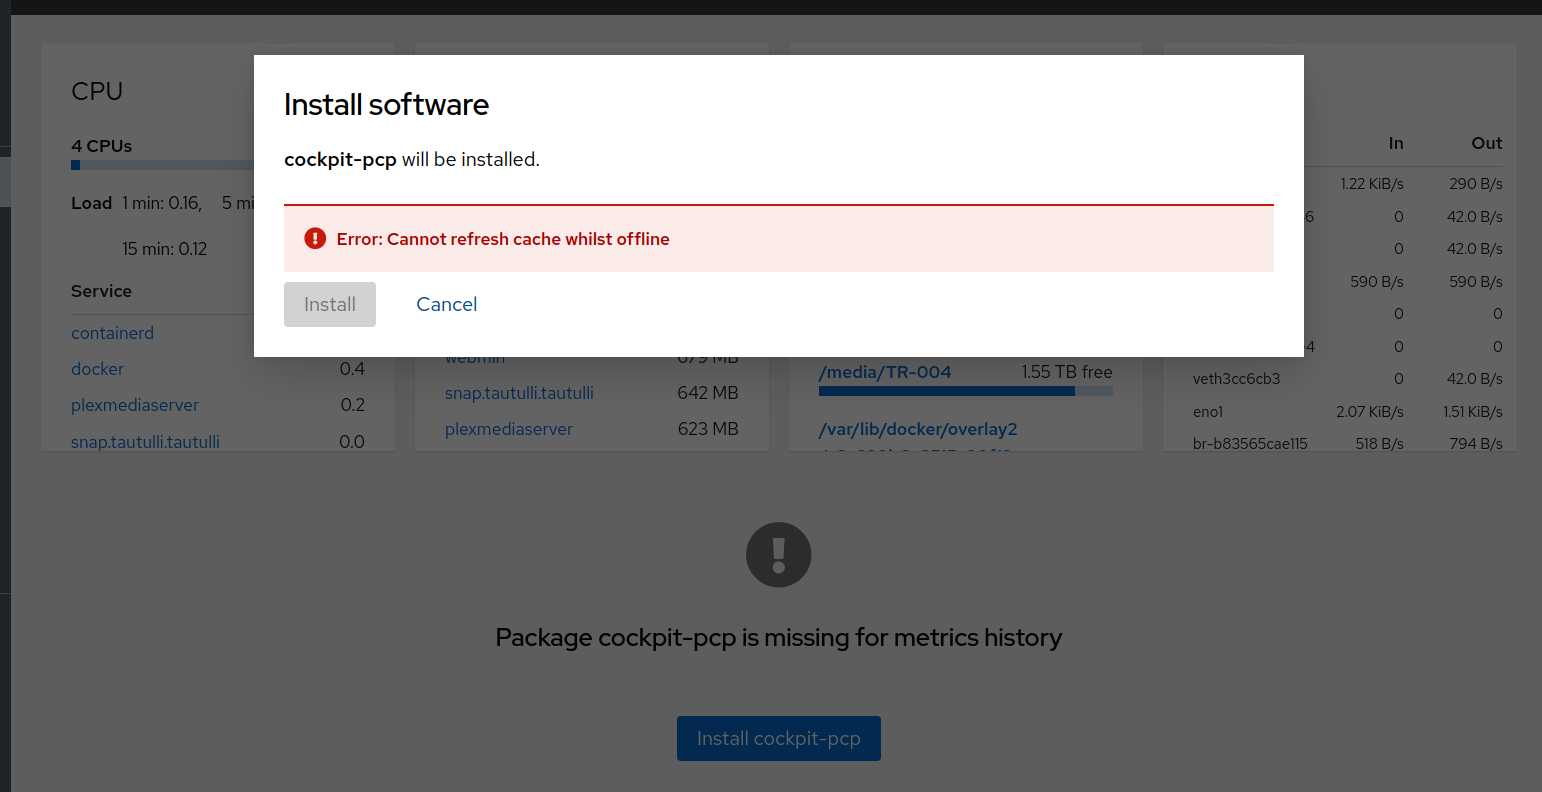
If you're here because you're on Cockpit running on Ubuntu 22.04.1 LTS and you can't get the Cockpit Updates functionality to work, here's the answer to get it working.
By disabling the network-manager, we can resolve those errors (Yes, It’s more of workaround rather than fix)
Warning: Do not run these commands on production server, unless you know what you are doing.
Disable network-manager service and stop it immediately, then restart the system
sudo systemctl disable network-manager.service
sudo systemctl stop network-manager.service
sudo reboot
Now, get back to cockpit, errors won’t be there anymore